Blower Door Test and Last Layer of Insulation

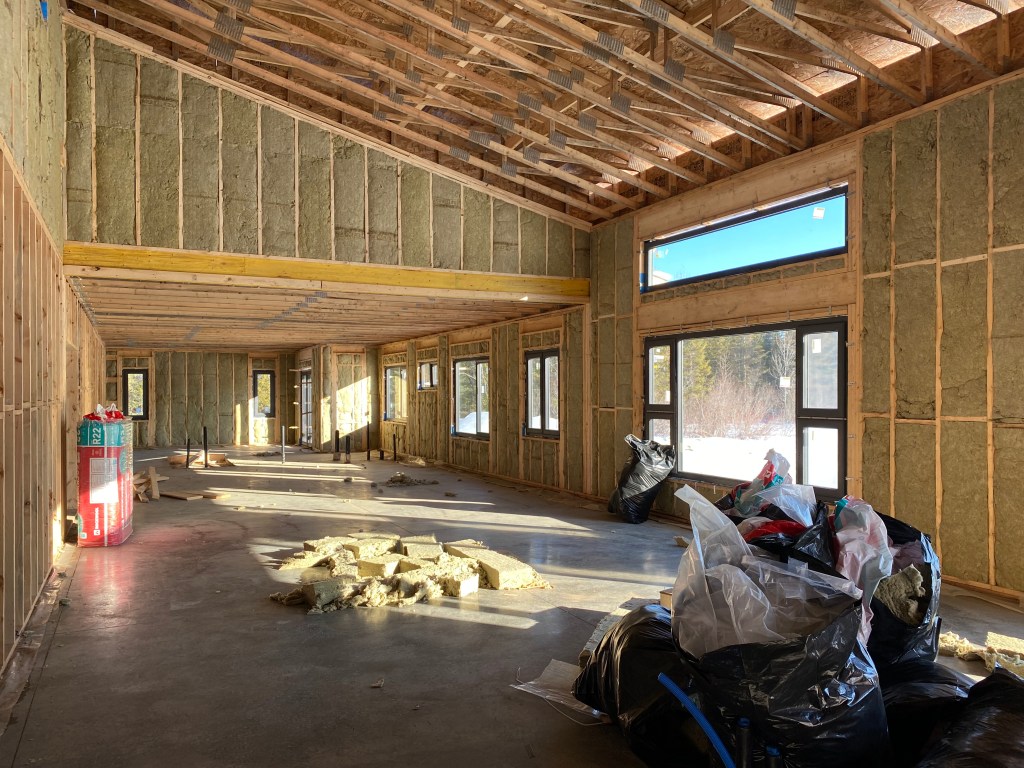
In addition to being highly insulated, our house is meant to be very airtight to prevent heat from escaping. To achieve this, any gaps or openings need to be filled to prevent air leakage. With rough ins mostly done, we needed a blower test to gauge how well it had been sealed. With this test, a big fan is attached to a door to move air through the house while measuring the rate at which indoor air is replaced by outdoor air via any unfilled holes. The lower the score, measured in air changes per hour (ACH), the more airtight the house is.

On the first test, the house scored 1.6 ACH. While a typical new home would have a score around 3 ACH, for our purposes, this was a fail. And the testing team was stumped, unable to find the source of the leak. They suspected air was passing beneath the wall studs. The energy auditor suggested we try Aerobarrier, an acrylic sealant product that is sprayed as a fog inside the house to seal any gaps. This got the blower door test down to 0.19 ACH, though it made our floors very sticky – we’re hoping this washes off easily. Our final pre-drywall test this week was 0.57 ACH. We’ll have one more test after drywall is done.

With the blower door test done, we were able to get to work adding the final layer of insulation in the service wall. We did that work ourselves. Installing the Rockwool was straightforward, though we were disappointed to find that many of the studs in the service wall were not spaced at 16 inches on center, necessitating a lot of cutting of batts. It was dusty, itchy work, but satisfying in the end. With the temperature swings in recent weeks, it’s neat to feel how well the house is holding its heat. It has felt noticeably warm on cold days and cool during a short hot spell. 

With spring here, we’re racing against nature to get the house sealed up again. A pair of mourning doves has been trying to move into our attic via an open access and nest in the porch, presumably to establish squatters’ rights before we gain occupancy. They fly over to roost on the roof as soon as they see us pack up the car, taunting us from their perch. We hung plastic, over the porch but they were persistent and pushed through, so we went back with a sturdy tarp and some old shower curtains, which seems to be holding them back for now.

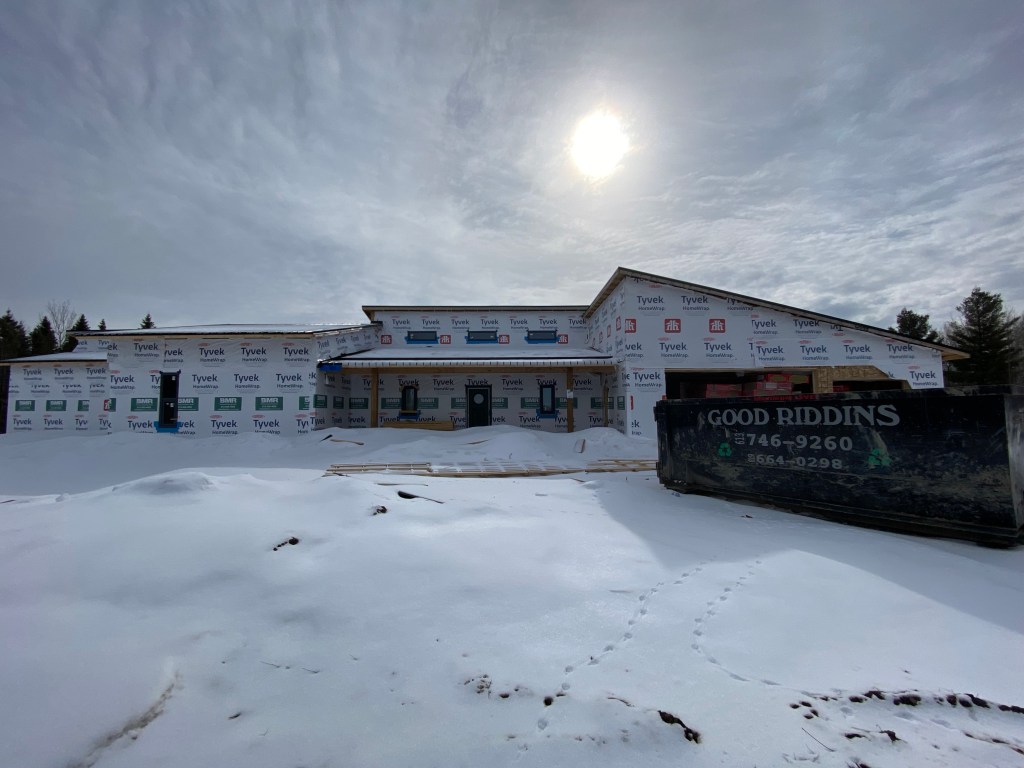
The exterior wrap of our house is nearly done. The siding installers still need to finish up the garage and house walls inside the screened in porch. We went with corrugated metal siding and are happy with the look. It cost more than vinyl but much less than fiber cement or wood. We were attracted by the durability, longevity, and minimal maintenance required.

This week, we’re pushing to have the electrician wrap up so the drywallers can start. We’re also mapping out the next few weeks and scoping what other work we’ll do ourselves to get us to the finish line by July 1.

Navigating Construction Loans

Work has plodded along between several heavy snows over the past few weeks. The roof is finished, though I’ve had only fleeting glimpses of it under all the snow.

We also have most of our windows and doors installed now, with the exception of two replacements being shipped from Ireland and those for the garage, the latter of which should arrive soon. Car doors for the garage were supposed to be installed this week too, but there was a strange mishap with the installation technician – a whole thread I’m still trying to unravel.

Work has been underway to insulate the interior. R-22 Rockwool batts are in place in most of the exterior 2×6 walls. Spray foam insulation should be going into the roof this week. Everything gets sealed with an Intello Plus air/vapour barrier that will help keep conditioned air inside. The vapour barrier promotes drying of the wall outward in the winter (by keeping comparatively more humid indoor air inside) and drying inward in the summer (by keeping more humid outdoor air outside) and creates an airtight seal. That seal, along with the thick insulation makes the house like a vacuum thermos that will retain heat for long periods.

Once insulation is complete, the framers will be back to finish up framing, including building the 2×4 service wall along the exterior walls, and the interior walls between rooms. Once that’s done, we need to orchestrate several components to come together within a short space of time to get us to our next construction milestone, including more insulation, as well as electrical, plumbing, and HVAC rough-ins.

One of the challenges of building a home has been working within the confines of a construction mortgage. This became evident from the get-go with a number of hurdles to overcome.

First hurdle was the reluctance of banks to offer this type of loan. Early in the project, we called around to a few different banks, often getting different information, depending on who we talked to and coming away with the sense that most lenders didn’t offer construction mortgages at all. At one point, we considered going with a private lender. Despite the higher interest rate, this would have provided a good deal of flexibility, which comes in handy with a big project. In the end, after enough calls, we got through to the right people at two big banks. Bank one wanted quotes from every subtrade as part of the application, a task that proved nearly impossible. Bank two had a more straightforward process, similar to a conventional mortgage application – demonstrate income, show proof of down payment, show project cost estimate. Needless to say, we went with bank two, where we were also lucky to lock in a low interest rate that will carry over after we convert the construction loan to a conventional mortgage when the house is done.

Next hurdle, one that we’re currently puzzling out, is navigating the structure of the construction loan. With the loan, the bank releases money in stages, corresponding to the assessed value of the property at different milestones. This unfortunately does not always correspond with the cost of different line items. Compounding the problem is that a few assumptions go into the assessment, such as a) that it is a conventional build (i.e., less value ascribed to things like building envelope) and b) that it is on a serviced city lot (i.e., no expensive septic system or well to install). The assessor is independent of the bank and works off a standard template. They tend to make assessments based on what they know and are familiar with. What this means for us is that we have to carefully plan out how to meet each milestone, and work to help the assessor understand our project. And so, we’re plotting and talking, and progressing bit by bit. 

On a sidebar note, another little challenge to keep life interesting comes to us from Hydro Ottawa, who hired a contractor to dig a hole for a new hydro pole. Said contractor deposited all the dirt from said hole into the ditch, completely burying our culvert and blocking the ditch with the spring melt just around the corner.

Our tips for finding a construction mortgage

  1. Be organized, you’ll need to be ready for or in the process of applying for permits. The bank will want your final design and costed build estimate, along with proof of down payment, proof of land ownership, assessed value of the land, proof of income and assets. Some banks may also ask for quotes from sub-trades.
  2. Start local. We had better luck calling up local banks than going through online forms.
  3. Be persistent. Sometimes you just need to find the right person who is familiar with the process to get the information you need.