Building the Kitchen

Our original plan was to install a custom kitchen, but in the end we decided to go with IKEA for a number of reasons:

  1. to save money (at least $10K less on cabinets and labour)
  2. we felt they were good value with the number of features included
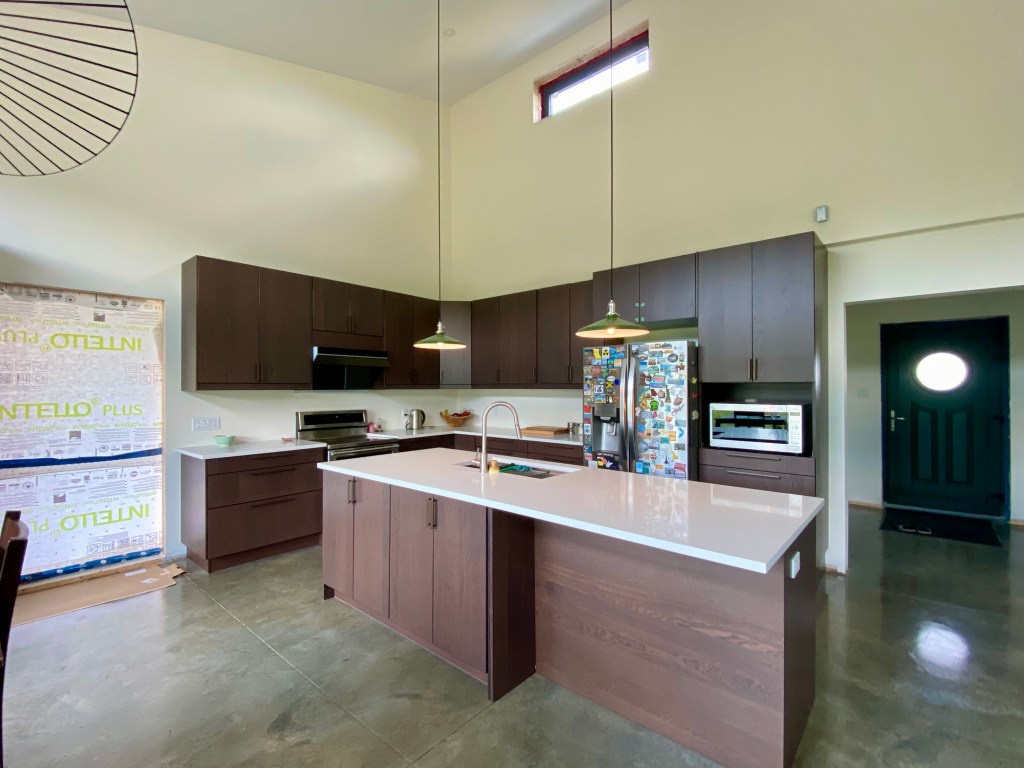
  3. our kitchen layout was relatively simple (l-shape and island)
  4. it seemed like it would be within our capabilities.

In hindsight, we were a bit over-optimistic about how straightforward things would be (and man, was it a lot of work!) but we’re glad we did it. It was not without some frustration along the way though. 

Some things that went well:

  • Designing the kitchen is fun with the online planning tool which lets you configure things how you want them
  • Once designed, you go to the store where an associate checks over your measurements and creates the order, which is a straightforward process
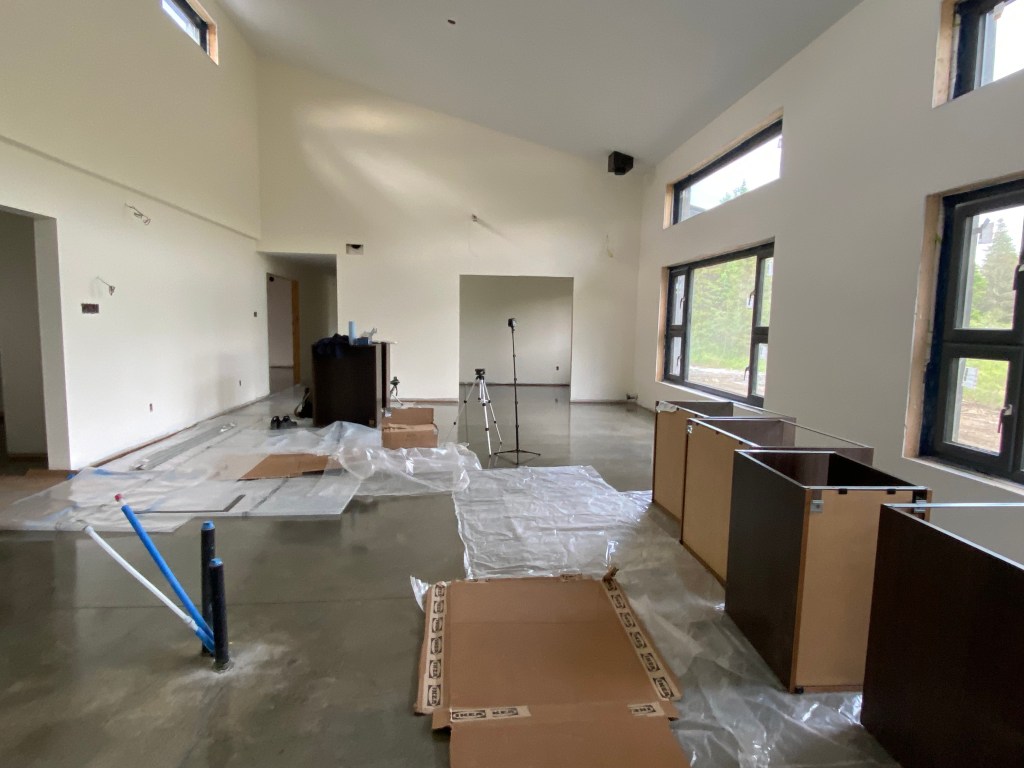
  • You get a plan and, after a good sorting and organizing, it’s easy to figure out which cabinets go where
  • Assembling cabinets is indeed a lot like building IKEA furniture and gives you a confidence boost starting out. Working as a team on an assembly line, we could power through them quickly.
  • Returns are easy
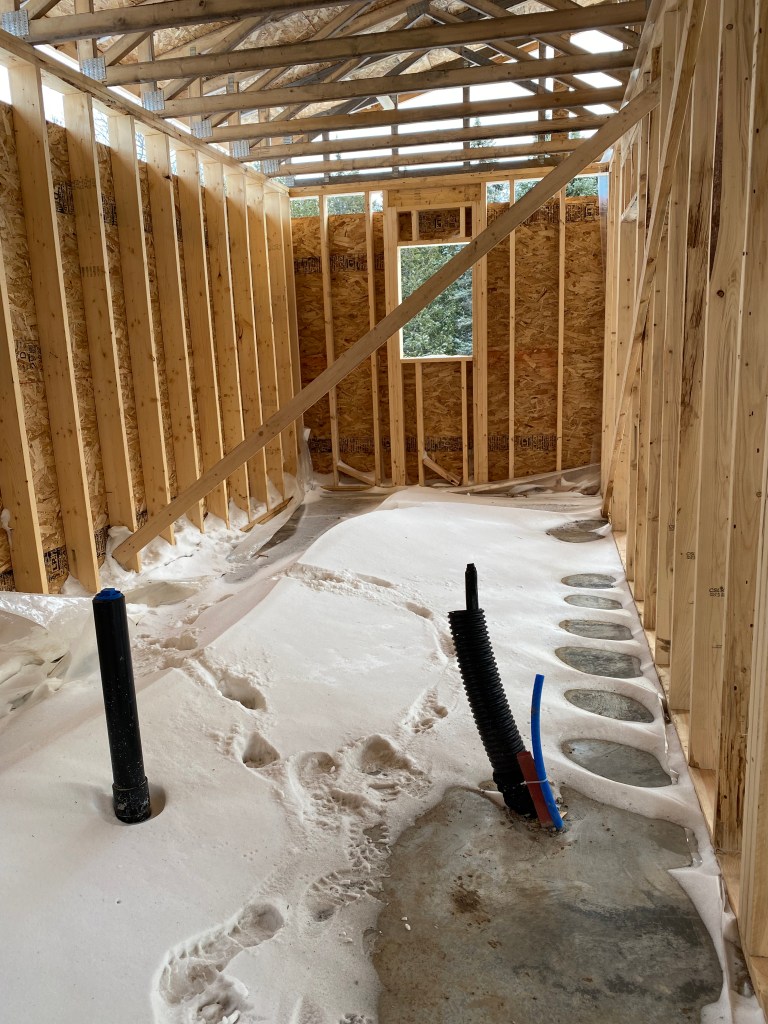
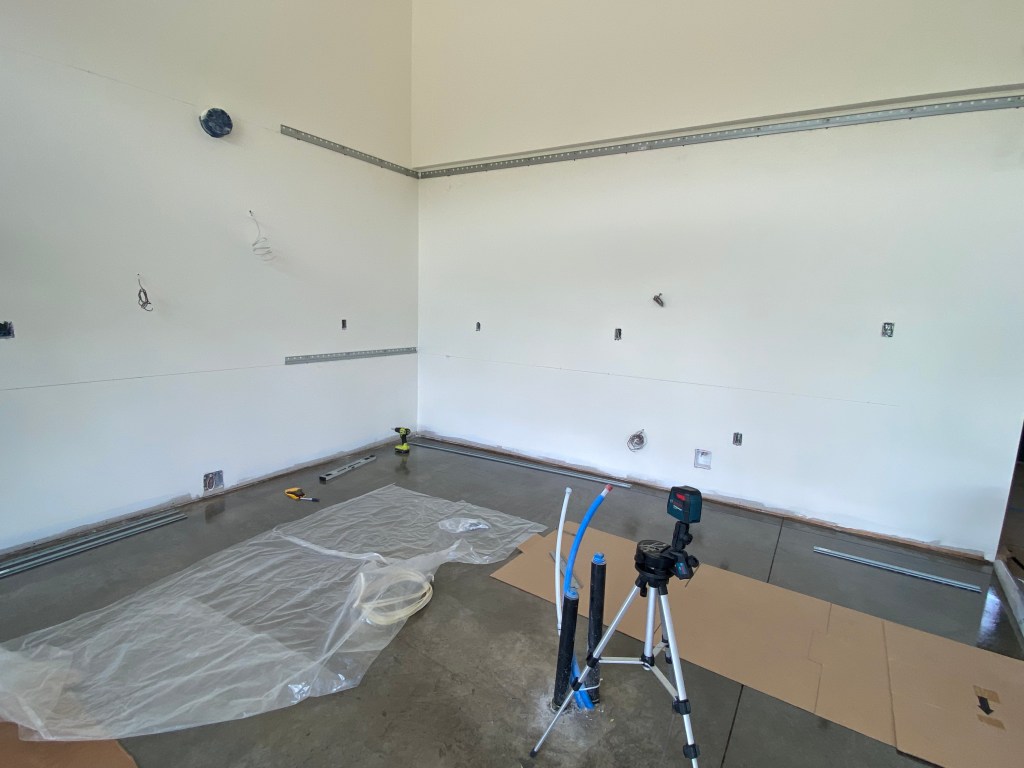
  • Having pictures of all the plumbing and electrical placement pre-drywall made things a bit less dicey drilling into walls
  • The hardware works well and its really nice having soft close drawers and doors
  • The accessories make for functional, organized interiors
  • Having all drawers on the bottom is the great and really makes everything more accessible
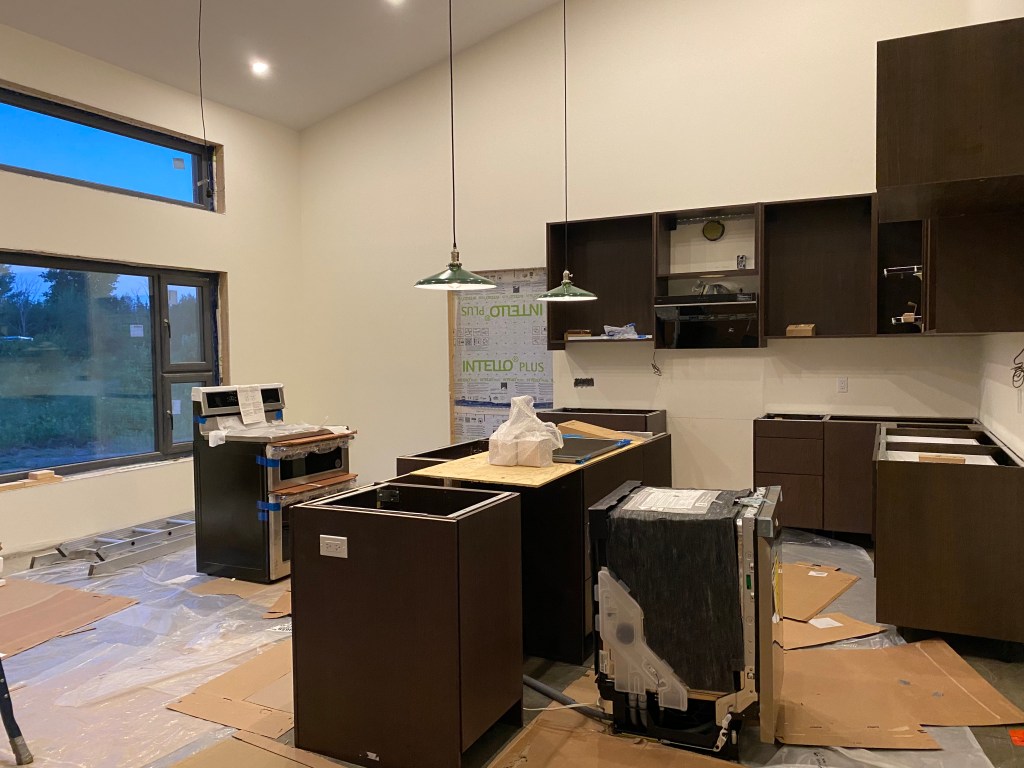
  • We made sure we had lots of task lighting
  • We ended up with a lot of storage and lots of work space, which was a big wish list item for us

Things that didn’t go well:

  • Some of our delivery experiences were a hot mess with things arriving in a jumble and broken
  • Sorting things out after delivery went awry was absolutely wonky.
    • In one case, I spent a week calling daily and being assured by multiple associates that my replacement pieces were on their way and to call back the next day if I hadn’t received anything, only to find out on the 6th day that, in fact, there was no record that any replacement parts were being sent and that I should call the store for a resolution. The store then told me I was not allowed to call the store, but after some back and forth, finally sorted it out.
  • Inventory seems inaccurate at best with multiple confirmed orders only being partially completed due to stock running out.
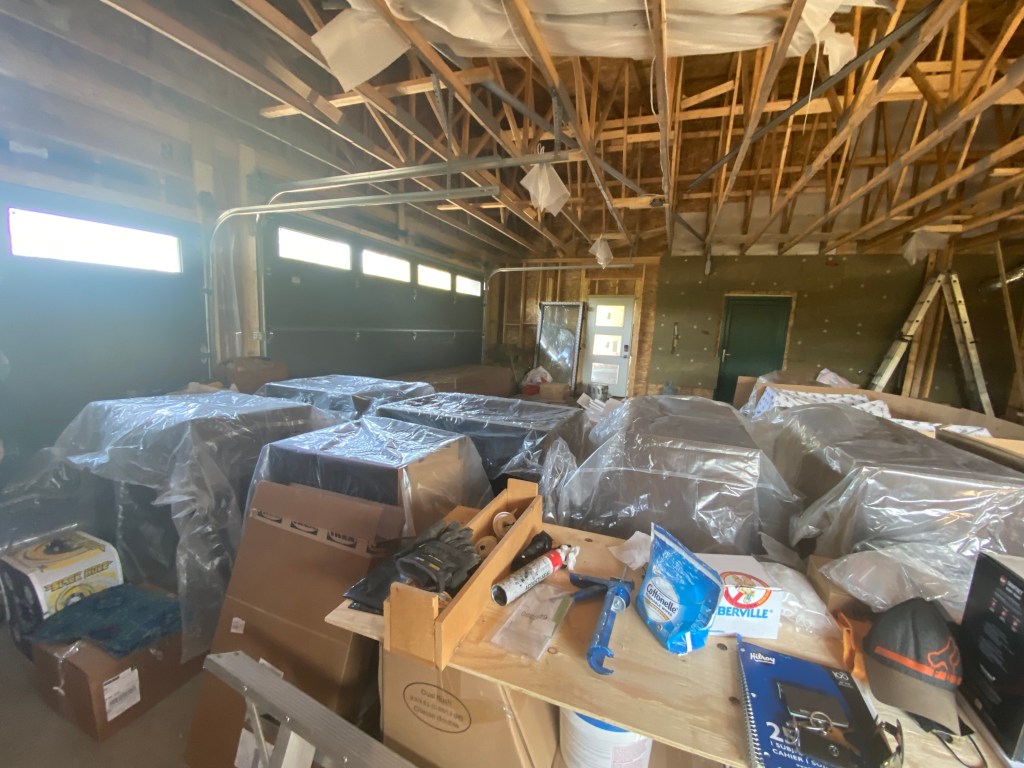
  • Cover panels are sent with no instruction as to what goes where and need to be measured and cut to size on site, which is a bit more involved of a process than anticipated. In fact, despite the instructions telling you that you can do it all with a screwdriver, a hacksaw, and a bit of pluck, we made full use of a garage full of borrowed power tools and don’t know how we’d have made it through without.
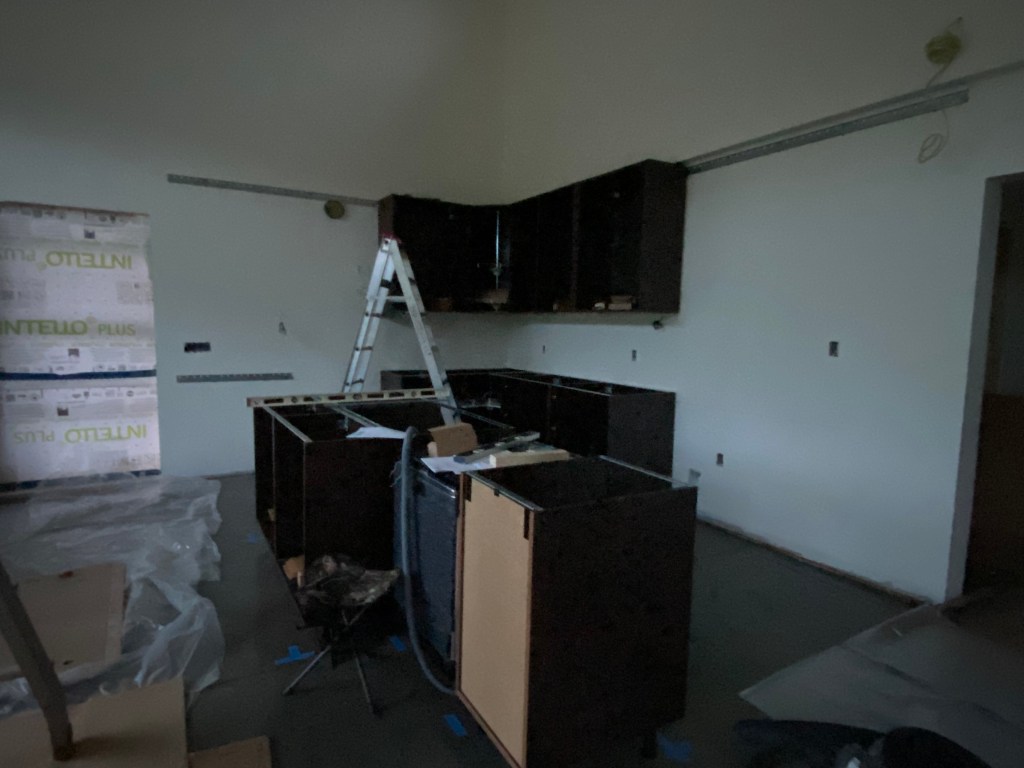
  • Hanging cabinets based on the IKEA system would be a cinch under ideal circumstances, however, you don’t realize just how uneven your walls and floors are until you try to install a kitchen perfectly level. Having unevenly spaced studs is also really annoying when trying to hang cabinet rails.
  • Our kitchen came with enough cardboard packaging to cover our floors twice, which was great for keeping floors clean but a mess to clean up after
  • The screws and nails are not the best quality and we ended up getting replacements from the hardware store for some things

We read in reference book that a few adults can install an IKEA kitchen in a weekend, which was a joke, at least for the kitchen we made. It took 10 long days of hard work (with many thanks to our helpers!) and we’re still picking away at things, with a few handles and cover panels to go, not to mention a backsplash, which we’ll get to eventually.

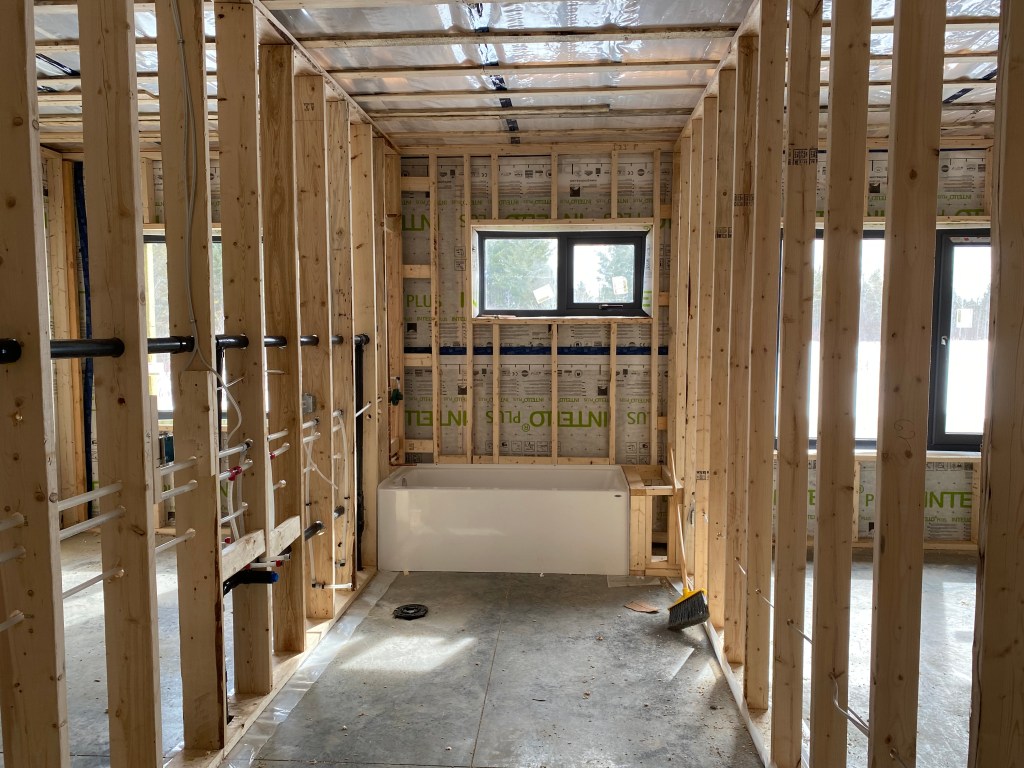
In the end, we’re happy with the end result. There are some things that, if you look closely, are a bit off or that we’d have done differently, but nothing we can’t live with. We were also feeling confident enough after to tackle storage for our ensuite bathroom, mudroom, laundry room, and walk in closet, which helps bring some order to the chaos of a mostly built house.

Service Hookups

We’ve been on a weeks long sprint now and things are coming together. After painting was done, we needed to get services to the house so we could get electrical, plumbing and HVAC done.  Because we’re on a rural lot, that meant that we needed a septic system for sewage disposal and a private well for drinking water. Normally these things come first in the build sequence, but we did it all backwards to complicate things (because framing the house pushed so long into the winter, we ran out of time and had to wait for spring).

Our original plan had been to install a conventional septic system with a septic tank and leaching bed and effluent feed via gravity flow. We had to adjust course after we got a gob-smacking quote for the amount of fill that would have been needed to grade our lot to accommodate this. Our redesign adds a pump chamber and dosing pump to distribute effluent over a mounded leaching bed. This was a bit more expensive than a conventional system, and means we have a big mound on our lot, but still better than spending $100,000 on dirt in our books.

Excavation made us no friends with the neighbours as the septic installers had to hammer through bedrock to install the septic tank. Once that was done, however, things were looking like they’d wrap up quickly when our electrician popped up with bad news – Hydro Ottawa had decided that we could not run our electric hookup along the side of the driveway as planned, but rather, we would need to install a trench under the driveway and encase the cables in concrete. This, naturally, entailed even more bedrock hammering and rendered our site mostly inaccessible for other work for a month and a half while we waited for all the necessary inspections. Oddly, the hydro inspector was a bit perplexed about why we’d been required to do all this, however, we’re thankful the work got in under the wire just before Hydro Ottawa went on strike. With electricity hooked up, we could move along with everything else.

For the well, we had to wait for seasonal load restrictions to be lifted for the 80,000 lb truck to be able to come and drill. Spring is not an ideal time to drill wells, and there was some hemming and hawing about whether the ground was too soft to bring the truck in, but it was ok in the end and no one got stuck. 

The well technician found water at 140’ down with a good flow rate of 20 GPM. We needed to test the water to make sure it was safe to drink. Public Health Ontario provides free well water testing for bacterial indicators (E. coli and Total Coliforms). Our first test came back with a result of overgrown for Total Coliforms, but we discovered our contractor hadn’t disinfected anything after installing. So, we shock chlorinated the well and it’s been fine since. Though only bacterial testing is required for occupancy, we also got the water tested via a private lab for general chemical characteristics and heavy metals. Those tests told us what we’d suspected – that we have very hard water and will need a water softener to prevent scaling in our pipes and appliances – but we’re happy to know that we have good water quality overall. 

It’s much easier to work on a house with electricity and running water where you don’t need run in and out to switch a generator on and off or try to clean things with bottled water. It really helped us with our next big task: installing our kitchen.

Rough-ins

The past several weeks have thrummed along with good progress. It was exciting to see so much activity on site with several trades working concurrently. Work done over the past few weeks includes:

  • Interior walls and service walls built, framing finished
  • Exterior insulation installed
  • Exterior wrap started, including soffits, fascia, window capping
  • Garage doors installed
  • Plumbing rough-in
  • Electrical walk-through and rough-in
  • HVAC rough-in
  • Chimney and air intake rough-in for woodstove
  • Ceiling insulation installed

Our house was recently assessed at 61 percent complete – finally more done than there is left to do (in theory at least)! We’re getting to the point where we can start tackling some of the work ourselves. First task will be installing the final layer of insulation in the service walls before the drywallers come at the end of April.

The service wall consists of 2×4 studs along the exterior walls and 2×2 furring strips on the ceiling. All the electrical and plumbing are meant to run through the service wall so that there’s a continuous layer of insulation to the outside. We’ll be adding R-14 Rockwool insulation batts to the 2×4 walls for our final layer of insulation, bringing the walls to R-48. The ceiling had 22 inches of cellulose insulation blown in with an R-value of 77.

Prior to the electrical rough-in, our electrician drew a draft plan of where he thoughts light fixtures, switches and outlets would go, we then made edits and did a walk through to confirm placement and types of fixtures, making sure things like switches weren’t placed behind doors or furniture. Unfortunately, when it came to the rough-in, something got lost in communication and the electricians who carried out the work ran wires through the attic, poking holes in the vapour barrier rather than running along the service wall on the ceiling, so that had to get patched and sealed. The electrician has also had some back and forth with Hydro Ottawa, trying to convince them to allow the service line for the electrical hookup to skirt around the driveway rather than cross it, as crossing under the driveway will require encasing the line in concrete ($$$). That plan was rejected, however, so we’ll have to have concrete poured. On the plus side, a new hydro pole was finally installed and the culvert was unblocked after several calls from our project manager. Because we only needed one pole, which is located in the right of way, we didn’t have to pay for the replacement. It came in the nick of time too, as a recent ice storm brought down several trees and hydro lines throughout the area.

This week, we should receive our first blower door test to determine how airtight the house is, along with final framing inspection so we can get to work on insulation and get things cleaned up for the drywallers. We’re also working our way through a long shopping list, getting things like bathroom fixtures, vanities and cabinets bought so they’re ready to go when we need them.

Navigating Construction Loans

Work has plodded along between several heavy snows over the past few weeks. The roof is finished, though I’ve had only fleeting glimpses of it under all the snow.

We also have most of our windows and doors installed now, with the exception of two replacements being shipped from Ireland and those for the garage, the latter of which should arrive soon. Car doors for the garage were supposed to be installed this week too, but there was a strange mishap with the installation technician – a whole thread I’m still trying to unravel.

Work has been underway to insulate the interior. R-22 Rockwool batts are in place in most of the exterior 2×6 walls. Spray foam insulation should be going into the roof this week. Everything gets sealed with an Intello Plus air/vapour barrier that will help keep conditioned air inside. The vapour barrier promotes drying of the wall outward in the winter (by keeping comparatively more humid indoor air inside) and drying inward in the summer (by keeping more humid outdoor air outside) and creates an airtight seal. That seal, along with the thick insulation makes the house like a vacuum thermos that will retain heat for long periods.

Once insulation is complete, the framers will be back to finish up framing, including building the 2×4 service wall along the exterior walls, and the interior walls between rooms. Once that’s done, we need to orchestrate several components to come together within a short space of time to get us to our next construction milestone, including more insulation, as well as electrical, plumbing, and HVAC rough-ins.

One of the challenges of building a home has been working within the confines of a construction mortgage. This became evident from the get-go with a number of hurdles to overcome.

First hurdle was the reluctance of banks to offer this type of loan. Early in the project, we called around to a few different banks, often getting different information, depending on who we talked to and coming away with the sense that most lenders didn’t offer construction mortgages at all. At one point, we considered going with a private lender. Despite the higher interest rate, this would have provided a good deal of flexibility, which comes in handy with a big project. In the end, after enough calls, we got through to the right people at two big banks. Bank one wanted quotes from every subtrade as part of the application, a task that proved nearly impossible. Bank two had a more straightforward process, similar to a conventional mortgage application – demonstrate income, show proof of down payment, show project cost estimate. Needless to say, we went with bank two, where we were also lucky to lock in a low interest rate that will carry over after we convert the construction loan to a conventional mortgage when the house is done.

Next hurdle, one that we’re currently puzzling out, is navigating the structure of the construction loan. With the loan, the bank releases money in stages, corresponding to the assessed value of the property at different milestones. This unfortunately does not always correspond with the cost of different line items. Compounding the problem is that a few assumptions go into the assessment, such as a) that it is a conventional build (i.e., less value ascribed to things like building envelope) and b) that it is on a serviced city lot (i.e., no expensive septic system or well to install). The assessor is independent of the bank and works off a standard template. They tend to make assessments based on what they know and are familiar with. What this means for us is that we have to carefully plan out how to meet each milestone, and work to help the assessor understand our project. And so, we’re plotting and talking, and progressing bit by bit. 

On a sidebar note, another little challenge to keep life interesting comes to us from Hydro Ottawa, who hired a contractor to dig a hole for a new hydro pole. Said contractor deposited all the dirt from said hole into the ditch, completely burying our culvert and blocking the ditch with the spring melt just around the corner.

Our tips for finding a construction mortgage

  1. Be organized, you’ll need to be ready for or in the process of applying for permits. The bank will want your final design and costed build estimate, along with proof of down payment, proof of land ownership, assessed value of the land, proof of income and assets. Some banks may also ask for quotes from sub-trades.
  2. Start local. We had better luck calling up local banks than going through online forms.
  3. Be persistent. Sometimes you just need to find the right person who is familiar with the process to get the information you need.

Closing Out the Outdoors

This week things have picked up again. Our current building theme is closing the house to the outside. The Tyvek weather barrier is (mostly) up and windows and doors are here! Unfortunately, they’ve had a rough journey – one door arrived in pieces, one window is missing and one has some damage. In retrospect, it may have been best to get them on site and inspected ASAP as now we’ll be waiting on replacements, though they should be on the next shipment to Canada. Thank goodness for warranties. So far, I am pleased with those that have arrived. Installation has started and most of the south-facing glazing is in. 

We bought our windows and exterior house doors from Klearwall, an American company that imports them from Ireland. The windows are certified for use in passive houses (they’re from the PassiV Futureproof UPVC line, as are the doors). Some of the features that make the windows high performance include:

  • Insulated frames with little compartments inside to reduce heat transfer (i.e., thermally broken)
  • Triple glazing with argon gas between panes
  • Low-emissivity coating to reflect heat, helping keep heat in the house in winter and out of the house in summer
  • Airtightness

The tilt and turn feature is neat and something we’re looking forward to; it allows the windows to be tilted open at the top or turned inward hinging on the side. One downside is that they don’t come with screens, which are apparently not common in Europe (I’m not sure why), so we’ll have to either get those specially made or hope there’s a This Old House video to show us how. Klearwall sent us clips to attach screens to the outside.

We had looked at windows from a few local companies, but the quotes we got for anything comparable in performance were at least twice as high. In fact, I regret that we didn’t order the garage window from Klearwall as well, which we left out thinking we’d save some money buying a standard double pane window locally. That turned out to be a poor assumption realized too late, as the Klearwall windows had a 6-month lead time. 

Our roof installation also started this week, but I haven’t been able to see it yet, as it was immediately covered in snow. I suppose we’re getting our money’s worth by putting it to use already. We chose a metal roof because we wanted something low maintenance with a long lifespan as we intend to install solar panels on top.

Roof, window, and door installation will continue this week and our house will begin to close in. Feeling industrious, I decided to begin moving the outdoors back out of the house. With recent mild temperatures, the caked-on mud on the floors has thawed and dried, so I did some (actually, a lot) of sweeping. You can almost see the floor again!

Framing Begins and Keeps Going

Framing has taken decidedly longer than expected. When work began at the end of October, we anticipated that it would take 3-4 weeks at most. Unfortunately, work has progressed slowly, there were missed days, and winter weather struck a few times. On the bright side, I’ve enjoyed seeing the house evolve when I stop by to clean up every few days. It’s very satisfying to see the rooms you envisioned take form and to gaze out newly framed views, picturing future you taking in the same scenes with a cup of tea in your finished home. I’ve also perfected my shovelling techniques and gotten lots of exercise digging out snow drifts inside our nascent home. Fingers crossed that this is the only time I have to do that in my life.

Our house will have double stud walls, making things a bit more complicated. After all the exterior walls are framed, a second wall will be built a few inches out along the interior perimeter. This wall, our mechanical wall, holds the plumbing and electrical wiring, allowing our house to be wrapped in a thick layer of continuous insulation. The walls should have an R value of 48 when all is said and done.

Our windows and doors have been waiting for us in Montreal for a few months now and I can’t wait to see them in place in the next few weeks, not least because they’ll keep the snow out! They were supposed to be delivered on site Friday, but there were some crossed wires, and the driver didn’t arrive until 4:30 pm, after the crew had packed up and left, so that will need to get sorted this week. 

After windows are installed, I’m told interior insulation comes next. Our roofers have also been raring to go for some time. It’s hard with a complicated project like this when one component holds up others. It also impacts our construction loan, which I’ll write about another time. For now, I’m basking in the winter view out my future kitchen window.

Image of sun shining on field covered in snow with forest in the distance
I’ll savour the winter view out the kitchen all the more when there’s an actual window in place and I’m cozied up by the fire.

The Foundation

After delays with excavation, we were excited to move on to the foundation and then framing where we would finally start to see our house take shape. 

Foam for our foundation was delivered on a stormy day at the end of August, precipitating a mad dash to the site where we ran around in the mud getting everything under a tarp so it wouldn’t blow away in the wind. The foam was neat though, like Lego blocks that fit together in a tidy puzzle.

Our house is being built on a raft slab foundation. This type of foundation forgoes footings below the frostline and instead ‘floats’ on top of the ground. A thick layer of foam insulates the concrete slab against freezing and frost heave. Loops of drainage tile and grading around the slab move water away. Benefits were that we could avoid blasting through bedrock close below the surface and cost savings due to ease of installation. The slab designer didn’t quite get the design right, overlooking the need to insulate between the heated house slab and unheated porches to avoid thermal bridges but our project manager caught this and was able to correct it during install.

With the foam laid, next came install of tubing for in-floor radiant heat. My toes are excited for this feature. We had tubing laid in the garage to give us the option to add a manifold to heat that space in future.

Things were moving along at a good clip when we hit our next little snag. A national cement shortage halted work for a few weeks while our project manager sourced cement for our pour. Luckily though, the wait wasn’t too long and the slab was completed by the beginning of October. A sealant was applied after the pour, which will need some touch ups toward the end of the build but this will be our finished floor. I thought it looked like the skating rink we’d cleared on the pond the winter before.

Foundation done we were ready for framing. 

Submitting for Permits

At the beginning of 2022, all our ducks were nearly in a row when we caused our own delays by rethinking our house design. It wasn’t a major change in the grand scheme of things, but we ultimately decided to go with our gut on two things weren’t quite sitting well with us. One was to bring our kitchen closer to our south-facing windows for more natural light and views and the other was to nix the idea of an unconditioned entryway – our architect had used in other projects but that we weren’t totally sold on it. 

My take is that you shouldn’t have to work too hard to convince yourself that you can live with something, so if it bothers you, change it while you have the chance. Also, it’s best to feel sure by the time you submit for permits because things start to feel very real from that point. Designs done and dusted, we were ready to submit for permits at the end of May 2022.

There are a few approvals we needed to get before breaking ground on our house, including:

  1. Septic permit
  2. Private approach permit
  3. Building permit

Each of these needed supporting documents and had fees attached.

Septic Permit

Because we are building in rural area, we won’t have any connections to city services for sewage or water. This means we need to install a septic system and a well. In Ottawa, septic systems require a permit, which is issued by the Rideau Valley Conservation Authority (RVCA). To apply for a permit, you need a site plan showing your proposed system and a grading plan. We hired an engineer (our architect arranged this) to draw these up. We found placement of the house on the site seemed fairly arbitrary, so there was a lot of back and forth with the grading designer to make sure it was oriented properly and located where we wanted it.

We paid around $900 in application fees and had our permit issued by RVCA within about two weeks of applying.

Private Approach Permit

If you are installing a driveway in Ottawa, you need a private approach permit to connect to the City’s property. Inspections and approvals go through the Right of Way Permit Office. You need to provide your site plan showing your proposed driveway, an application fee ($182), and a $3,000 Right of Way damage deposit. You can apply for a refund of the damage deposit after the work is done, provided no repairs to City property were needed.

One inefficiency we found is that your building permit application must be submitted in person at a City of Ottawa Client Service Centre. This is also where you pay your ROW damage deposit. The private approach permit application and application fee, however, must be submitted separately to the Right of Way Permit Office, which can only be contacted via email. You email your application then wait for them to call you to collect payment. 

The inspector texted me a picture of my approval within a few days of submitting my application, but it took another four weeks before I received a call back from someone to collect payment and issue the official permit. Perhaps some additional review takes place behind the curtain.

Building Permit

Building permits are issued by the City of Ottawa Building Department. This is a big package to pull together requiring a fair bit of coordination and includes:

  1. Your completed application form (architect completes most of this)
  2. Two hard copies of construction drawings reviewed and stamped by a structural engineer (architect created drawings and had them reviewed)
  3. Your septic permit, septic design and grading plan (completed by septic and grading designer, approved by RVCA)
  4. Your HVAC design (HVAC designer creates this)
  5. Your truss design (truss company designs this)
  6. If applicable: woodstove details, including manufacturer instructions for installation of stove and chimney
  7. A cheque for your building permit fee
  8. A cheque for your development fees

The building permit fee is calculated based on the total square footage of your house while the development fees are based on where you are located within the city. Our total development fees were about $20,000, which is at the low end for Ottawa.

Image of raw land with surveyor stakes marking perimeter of house to be built
Ready to build at last!

Once the package was submitted, the waiting game began. At the counter, the clerk said it takes about 10 days for a permit to be issued. Ours took about six weeks, which our architect and project manager assured us was quick compared to other projects they’d seen, particularly during pandemic times. 

Once submitted, your application does the rounds around the building department and if there are questions, the reviewer sends you a formal letter (via email thankfully) requesting a response. We only received two questions. The one we could answer instantly and the other – a request for additional detail about posts on our porch – required us to get updated drawings from the structural engineer. In June 2022, we had the official green light to proceed! This was 13 months after closing on our land and starting our build planning.

Owner, Builder, Project Manager

It’s easy enough to indulge in the fun parts of designing a house, but inevitably, practical concerns bring you down to earth. After all, the perfect floorplan doesn’t mean much if you can’t afford to build it. While an architect is an expert at giving form to your ideas, the best person to tell you how much a house will cost is someone with experience buying building materials and hiring trades. You need a contractor.  

If you’re building a net-zero passive-style home, you’ve narrowed the field quite a bit to a short list of people with experience building this type of house. We started our search by Googling contractors in our area that advertised net-zero builds and found three or four to interview. This process took some time. Contractors are chatty people, as a rule, and it can take persistence to get from initial talks and hypotheticals to firm answers. Still, we found it helpful to show them what we were working on to figure out whether it was even within the realm of possibility to build within our budget.

We spent several months in a Goldie Locks period of feeling people out. One had good pricing but was moody and combative, another talked a good game but lacked follow through, and one insisted it was impossible to build a house for less than seven figures while trying to scare us away from the competition by professing ominous, but vague concerns for our wellbeing. We eventually settled on one our architect had worked with recently, Kaner Contracting. They were good-natured, organized, and could work with our budget.

Image of steamroller on excavated land with gravel driveway
Ground officially broken!

A word on terminology, in Ontario, the New Home Warranty Program exists to ensure builders provide warranties on homes they build. In the usual scenario, a builder has control over the project and the subcontractors who build your home and then warranties the work after you take possession. If you’re building your own home, however, you may opt to be an owner-builder, meaning that you retain control over the project and are responsible for hiring subcontractors directly. You may hire a project manager with experience in building to coordinate the project. In this case, you don’t have a builder to warranty the build, though you still have the warranties of each sub-contractor. This is the route we opted to take for greatest control over our project. We also wanted to reserve the option to do some things ourselves where it’s within our abilities. All this to say, though I use contractor or sometimes builder as shorthand, we are our own builder and hired a knowledgeable project manager for our build.

With our project manager hired, it took several more months to get anywhere close to firm costing of our project. It seems that subcontractors don’t like to quote services too far out and, factoring in rapidly changing material prices throughout 2021-2022, a project estimate was a slippery fish to catch. We found ourselves a bit bemused trying to figure out how to keep within budget. All our ideas for keeping building costs down – things like simplified footprint, lower ceilings, less square footage – we’re shrugged away by contractors as saving us a bit but ‘not that much.’ Ultimately, it seems, building a house is a leap of faith. We got as close to a comprehensively quoted project as we could, took a hard look at our finances, our mortgage approval, and worst-case scenarios, and jumped. 

Our project officially kicked off in June 2022 with surveying and installation of our temporary access. We quite like our wide driveway!

What Next?

There are a million paths you can take to building a house from the relatively straightforward to the long and twisty. As we looked to build, the options as we understood them were:

  1. Buy a new build in a development. This is the (relatively) easy route, where you pick from a set array of houses and make limited choices about finishes, customizations, and paid upgrades.
  2. Buy from a smaller builder. You see these advertised on real estate websites sometimes as ‘to be built.’ You buy a package from a builder and have perhaps slightly more choice over selections than in a big housing development.
  3. Fully custom. The most complicated option, where after the excitement of finding land settles, you’re hit with the realization of just what you’ve gotten yourself into, peering apprehensively down the long path ahead of you and asking yourself ‘what next?’ 

As it turns out, we’re gluttons for punishment and opted for the long and twisty route of a fully custom build.

Building a house is no easy feat, as we learned by watching some neighbours a few lines over.

Now there are options to make this somewhat easier, with several companies offering house packages. These packages include a floorplan, construction drawings, materials, and project management. We seriously considered going this route and in fact, spent a fair bit of time trying to make it work with one such company. Our sense was that this was a great choice if your needs are straightforward. It was also the custom build option with the most transparent pricing, as we’ve since found out.

Ultimately though, it didn’t work out with the package company. As we thought through what we wanted in our home, a list of goals took form. We spent hours measuring out rooms, thinking how we would use different spaces, and sketching floorplans. We found in the process that it was easy enough to sketch up a house with different elements we wanted but not so easy to bring it all together to make a home. We wanted advice on what did or didn’t work if we wanted to achieve different goals and we’re getting that. So, we parted ways with the package company and ate part of our deposit.

Back to the drawing board, we began exploring another path: hiring an architect. We were initially skeptical of this option, thinking it was beyond reach. We interviewed a few who sent back quotes that confirmed our suspicions (no way did we have $70K+ just for design), but then a builder we talked to suggested someone they’d worked with previously. 

We met with this architect who had experience designing passive houses, had designed her own passive house, and seemed to understand our goals. Her fee was also within our budget. We hired Jane Wilson and dove headlong into the design phase. This is where the fun begins!